Wednesday, March 30, 2011

Updating a Condo!

My husband and I went to Texas last weekend to update a condo we own with another family (yes, we have a condo in Texas but live in Atlanta… long story.) Our partners went out and furnished the condo several years ago with things they had in their house and they bought a bunch of new stuff as well. Thank the lord above they furnished it so we could rent it for the past two years. My husband and I have never been to the condo and thought we were well overdue to make a trip. We got there, assessed what could be updated, made a list and then went to town!

My husband is NOT a shopper. Like not at all. He’s in and out of a store in 5 if there’s an occasion that needs a gift, and that’s about the extent of it. Christmas shopping is done in one day in about an hour and I cover the rest. It’s comical. Well, last weekend we spent 2.5 hours in IKEA alone! He was a trooper and so patient! He picked out so many things we used for the condo and needless to say, I was impressed with his shopping skills and good eye! 

We hit IKEA, Marshalls, Homegoods, Ross, Target and a few other local spots to try and find all the stuff we needed.

Our starting point was the living room. It has to include a dining area and also not get in the way of the sliding door to the patio. The original setup just didn’t flow well and it felt very dark and uncomfortable. And the brown wing back chair... It needed to burn in the nearest fire, and fast. Notice brown lamp shade and couch cushions. Say goodbye.

We flip floped the room and started to pile up our salvation army pile... the couch moved to the opposite wall, as did the dining room table.


I loved this wooden carved plaque that used to hang above the couch but just felt it needed to lighten up the space instead of darken it.
HELLOOOO spray paint!
After buying a new leather chair, side tables and pillows from IKEA follwed by new lamp shades and the two wooden plaques sprayed blue, we've got a new living room! SO much more inviting and comfy!!
The dining table fit nicely against the opposite wall and we just rearranged the chairs so two are on the outside. This was a good space saver.
New TV and TV stand cleaned things up a good bit too.


We relocated the TV, recovered the bar stools with IKEA fabric and simplifed the kitchen:

 
On to the master bedroom! Before...

We moved bed to other wall, added a flat screen and changed all the bedding:


Master Bath after photo since I forgot to take the before. It went from hunter green to navy, white and red. Love this bathroom!
Guest Bedroom is a very small, odd shaped room so putting a full or queen bed in there would prevent you from opening the door. This room was setup originally as best as possible but we found that most people renting had kids.
Before there was a pull out futon sofa, and old computer table and TV.
We donated the futon couch, computer and desk and went with bunk beds and a bean bag corner.


Alll in all, we had such a fun time with this weekend project and we really love the outcome! And IKEA, I heart you!

One last comparision!

Hope you enjoy and thanks for stopping by!
Katie

Wednesday, March 16, 2011

Wedding Sign

Okay seriously? Is there still a blog out there calling for a crafty mama? Has a mama jumped ship the last few months? Okay, okay… I know I’ve been a horrific blogger lately. This has been a crazy year… with a full time job, 2.5 year old and a 10 month old, life has kept this family very busy. In the midst of all our wonderful chaos, we found out a little surprise was on the way! Baby #3 has kept mama a little under the weather so my nights have been spent retiring to bed early instead of furiously blogging and surfing for fun ideas online!
In an attempt to get back in the saddle, I’m posting a wedding sign I did for a friend of mine last month. She got married outside and wanted a sign pointing towards the reception and wedding. She has such a fun little spark of personality and she loves bold colors. She picked a few colors from the feathers of a peacock and that’s what we used for the sign.
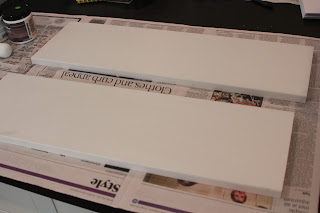
Started with three pieces of evenly cut MDF board... I got the board already painted white to help out with the task of painting. Smart move.
The Bride gave me a picture of a peacock that had the most beautiful colors. We picked a beautiful bold blue and an apple green color and color matched them as best I could at Home Depot. A quart was the perfect size.
Also, having a great roller is key to a smooth coat of paint.

I used my wonderful Silhouette SD machine to cut vinyl in several fonts. Reason #422 why I love my Silhouette. I used white and black vinyl and although it was time consuming, the finished product turned out great.
Here's the first round
Decided to add their wedding date and add another peacock feather on the bottom green board just to balance everything. I nailed it to a 6 foot stake with a pointed end so that they could easily put it in the ground. One mistake I did make was putting the nails in the fron of the MDF board. Should have done this on the backside, but after a little paint, it wasn't as noticeable.


Such a fun project to do and wish I'd thought of it for my wedding!
 Hope you enjoy!

Katie

Thursday, March 10, 2011

Ribbons for Everything


Hey everyone!  Here is my project of the week ... I painted this lamp with oil rubbed bronze back a few months ago (see previous post "Oil Rubbed Bronze ... Amazing!)  But this shade drives me crazy nuts.  BORING!
A glue gun ...
A roll of mini ribbon from Wal Mart ....
A little glue on the edge in small sections...
Press the ribbon in small sections ...
Not perfectly straight ... but much better ...
Adds a little character to my boring shade. 
Have a GREAT weekend! 

Wednesday, March 2, 2011

Spring Painting Project

A Spring project is here!  

Turn this maple bed .....

And this maple armoire..... 
into something spectacular!  Maybe a black antiqued finish? 

This furniture is circa 1999 people.  1999! (Boy, that will make ya feel old, huh?!)  Yes, in 1999, I rather liked this maple look.  Now .... not so much.  However, I do like the style.  Just a little paint and sanding may do the trick. 

I will especially have to sand these parts ....


My boys decided to unleash their artistic abilities on my bed with the point of a geometry compass .... hmmmm.   No, these are not their initials.  This one above is "APSW" ... also know as "Andrew Pirranah Snow Wolf."  HAHAHA! I have no idea what that means? 

Where was I when they were doing this?  I was here ... in my second home.  I really should put a TV in here. 

So, here is the scoop  - I talked with my ever trusting paint store genius, Todd, and got the low down on exactly what I needed to do.  There are 2 options.

Option 1(This one takes longer):
Sand it a lot
prime it and wait for it to dry
paint it

Option 2:
Paint it with a premium paint that has a primer built in and NO SANDING!!!  (except for the initials carved everywhere)
Uh, I am definitely doing this one.  Yes, it costs just a bit more in the paint department, but is totally worth it in the time department. 

My plan is as follows:

Take the bed apart
Set up shop in the garage
Clean the heck out of the wood so sanding is not required! 
Paint the bed first (next week, paint the armoire)
Let it dry
Sand off some of the edges with a sandpaper block to antique the finish (If you decide to do this, Todd, aka paint genius, says you will need to get an oil based paint so you can sand the edges).

I am starting the project soon! 

Spring is here in Georgia and it is time to get outside, enjoy the weather and paint this atrocity!

Check in to see the progress.  Join me with your piece of furniture you want to refinish!
Amy